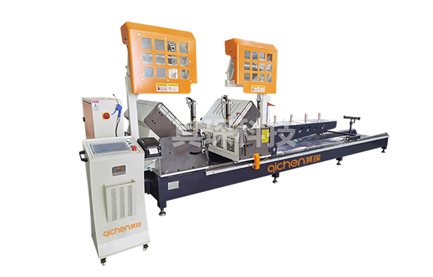
Systematic maintenance and care guide for aluminum profile cutting machines
-
Daily maintenance specifications (per shift/8 hours)
Chip cleaning
Use a vacuum cleaner to remove aluminum chips from the guide rails, worktable and cutter disc area (micro chips with a particle size of less than 0.5mm need to be cleaned up)
Use compressed air to blow the spindle taper hole to prevent aluminum powder accumulation and reduce the tool clamping force (air pressure recommended 0.4-0.6MPa)
Lubrication management
Linear guide: Inject ISO VG32 guide oil, 3-5ml oil injection for each guide
Ball screw: Apply lithium-based grease (NLGI #2), add 0.5g every 4 hours of operation
Gearbox: Check the oil level window and keep the oil level at 2/3 of the window height
Accuracy verification
Test cutting test: Cut 10mm thick 6063 aluminum profiles and measure the verticality of the section (required ≤0.05mm/m)
Use a dial indicator to detect the radial runout of the spindle (allowable value <0.01mm)

-
Weekly in-depth maintenance
Transmission system inspection
Tension detection of synchronous belt: measured with a tension meter, standard value 25-30N/mm², replace immediately if relaxation exceeds 10%
Re-tightening of coupling bolts: tighten in diagonal order, torque control at 18-22N·m
Cooling system maintenance
Cutting fluid concentration detection: measured with a handheld refractometer, concentration maintained at 5%-8% (water-based solution)
Filter cleaning: 100-mesh stainless steel filter soaked in alkaline detergent for 15 minutes and then high-pressure rinsed
Electrical component protection
Wipe the servo motor encoder interface with anhydrous ethanol to prevent oxidation and signal loss
Check the trigger response time of the emergency stop button (should be <0.1 seconds)
-
Monthly special maintenance
Maintenance of the spindle system
Use an infrared thermometer to detect the spindle temperature rise in the hot state (temperature rise ≤35℃ for 2 hours of continuous operation)
Replace spindle bearing grease: Use high-speed grease (such as KLUBER Isoflex NBU15), the injection volume on one side accounts for 30% of the bearing cavity
Precision calibration
Laser interferometer detection positioning accuracy (X/Y axis repeat positioning accuracy must be ≤±0.005mm)
Use ballbar to perform roundness test (radius error should be <0.015mm)
Structural reinforcement
Check the bed foundation bolts and tighten them to 180-220N·m with a torque wrench
Granite worktable flatness detection (allowable error 0.02mm/m²)


